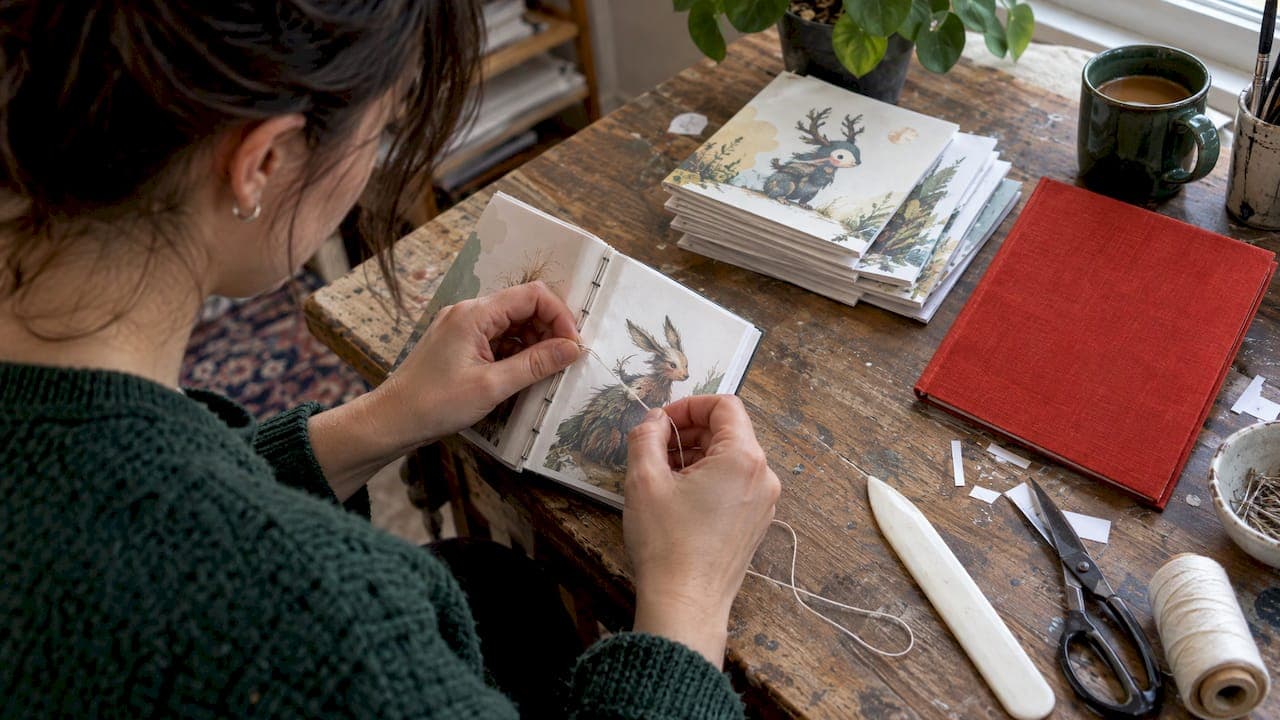
To bind a printable book at home, print the PDF in booklet order, fold the sheets in half, and join them along the fold with staples or thread. Short books of a few sheets can be stapled. Thicker books are better sewn. If you want a flat, glued spine, you can add a cover and glue. Below you will find the printer settings, the supplies, a method for each page count, and safety notes for books that will go to children ages 3 to 8.
TL;DR
- Print from a PDF reader using a booklet setting so the pages land in the right order after folding.
- Keep the page count a multiple of four. One folded sheet makes four pages.
- Staple short booklets, sew thicker ones, and use a glued or taped spine for flat documents.
- Score and crease every fold firmly, and trim the open edge last.
- For young children, skip loose rings, beads and other small detachable parts.
Table of Contents
- What you need before you start
- Step 1: Print the PDF in booklet order
- Step 2: Fold and assemble
- Step 3: Choose a binding method
- Fixing common problems
- Making a homemade book safe and durable for ages 3 to 8
- Our perspective on printable books
- Print, fold, bind: a Duckwave Decks option
- A simple first project: an 8-page mini book
- Tips for classrooms and homeschool groups
- FAQ
- Sources
What you need before you start
Most home binding needs very little. Gather these before you print:
- Paper. Regular copy paper works for inside pages. Cardstock or a heavier sheet works for the cover.
- A way to join the pages. This is a long-reach or standard stapler, or a needle and thread. A thin awl or a large needle makes the holes.
- A folding tool. A bone folder makes crisp creases. The edge of a credit card or the dull edge of a butter knife can stand in for one.
- A ruler, pencil and scissors. A craft knife and cutting mat are optional. A paper trimmer helps if you want clean, square edges.
- Glue and clips, for glued spines. PVA glue and binder clips or weights hold the spine while it dries.
One published example of a small hand-bound book calls for two sheets of letter-size cardstock, 12 sheets of letter-size copy paper, thread, a needle and an awl. That is a good size to try first. It gives you a book of about 50 pages once folded, which is plenty for a first project.
Step 1: Print the PDF in booklet order
This is the step that trips up most people. If you print pages one through eight in the usual order and fold them, the pages will not read correctly. A booklet layout places two pages on each side of a sheet so that they fall in sequence once you fold the stack.
In the free Adobe Reader, choose the Booklet option in the print dialog. It rearranges the pages so they are in the right order after folding. Then pick one of two routes:
- Your printer prints on both sides. Select duplex printing and print the whole booklet in one pass.
- Your printer prints on one side only. Print the front sides first, then reload the pages to print the backs. Follow the on-screen prompts and watch which way the paper feeds.
Before you commit a full print run, send a single sheet through and fold it. Check that the pages are right way up and that the back lines up with the front. Most home printers need the flip set to the short edge for booklets. If the back of your test sheet is upside down, change that setting.
If you design your own files, a clean PDF saves a lot of trouble. This print-ready PDF checklist covers the file prep that makes booklet layout predictable.
Keep the page count a multiple of four
One sheet folded in half gives four pages, so a booklet needs a page count divisible by four. If your book has 22 pages, add two blank pages, or use them for a title page and a notes page. Without this, the booklet tool pads the end with blanks you did not plan for.

Plan for creep
When many sheets nest inside each other, the inner pages stick out farther than the outer ones once folded. This is called creep. Saddle-stitched booklets that are too thick show it badly, and the stack is trimmed on three sides to even it out. For a children's book of 8 to 24 pages, creep is small. For anything thicker, leave a little extra margin on the outside edge of each page. You can also bind in smaller groups of sheets, called signatures, instead of one big nest.
Step 2: Fold and assemble
- Stack the sheets in order and align the edges.
- Fold the stack in half, then crease firmly along the fold with a bone folder or card edge.
- Open it and check that the pages run in order.
- For thick stacks, fold each sheet on its own, then nest the folded sheets together. Scoring each page before you fold it helps prevent cracking along the fold, especially on heavier paper or pages with a lot of ink.
If your cover is a heavier sheet, fold it separately and wrap it around the outside of the stack. Match the cover size to the pages exactly, or leave a small overhang if you plan to trim.
Step 3: Choose a binding method
The right method depends on page count, how long the book needs to last, and whether it needs to lie flat.
| Method | Best for | Page count | Opens flat? | Skill level |
|---|---|---|---|---|
| Saddle stitch (staples) | Short booklets, class handouts | Up to roughly 25 sheets | Mostly | Easy |
| Saddle stitch (thread) | Thicker folded booklets | More sheets than a stapler can handle | Mostly | Easy |
| Tape binding | Reports, manuals, flat documents | Varies | Moderate | Easy |
| Japanese stab binding | Decorative books, loose pages | Varies | Limited | Moderate |
| Coptic stitch | Books you want to open flat | Many signatures | Yes | Harder |
| Perfect binding (glued) | Paperback-style spines | Larger books | Limited | Moderate |
The categories above follow a bookbinding overview that lists staples or thread through folded sheets for under 25 sheets, with needle and thread for more. Tape binding, by comparison, is faster and more polished than stapling and suits reports and manuals.
Stapled booklet: fastest option
For a picture book of a few sheets, this is the one to use.
- Fold the stack and crease it.
- Open the booklet to the center spread and set the fold on a folded towel or a piece of foam.
- Staple twice along the fold, about a third of the way in from each end.
- Close the booklet and press the staple legs flat.
- If you stapled many sheets, trim the open edge to even it out.
If your standard stapler cannot reach the fold, use a long-reach stapler, or sew instead.
Sewn booklet: sturdier for thicker stacks
When a stapler struggles, thread is the answer.
- Mark three or five evenly spaced points along the fold.
- Poke holes through the whole stack with an awl or large needle. Do this on a cutting mat or thick cardboard.
- Thread a needle with waxed thread, about three times the height of the book.
- Start from the inside center, go out through the middle hole, then in through the next, and so on.
- Tie off inside the fold with a square knot.
Sewing takes 10 to 15 minutes and gives you a booklet that lasts much longer than staples.
Hand-sewn hardcover: for keepsakes
If you want a book that feels like a store-bought hardcover, the supply list gets longer. It includes thread, a needle, a bone folder, an awl, bookboard, book cloth and PVA or wheat paste. Allow an afternoon. When you attach the board to the cover material, leave a small gap along the spine so the book can open without straining. This gap is often a few millimeters, so follow the instructions in whichever tutorial you use.

Taped spine: neat and quick
For flat-lying documents like activity packets, tape the edge. Align the stack, clamp it, and apply binding tape or strong cloth tape along the spine edge. Fold the tape over the front and back. It looks tidy and takes five minutes.
Japanese stab binding: pretty and forgiving
This method punches holes along one edge and sews through them. Because the holes sit near the spine, leave a wide inner margin in your layout so that text does not vanish into the binding. It suits single sheets that you cannot fold, which is useful for printable coloring pages or flashcards turned into a book.
Fixing common problems
| Problem | Likely cause | Fix |
|---|---|---|
| Pages out of order | Printed straight through, not as a booklet | Reprint with the Booklet option on |
| Back side upside down | Wrong flip setting | Switch between flipping on the short and long edge, then test one sheet |
| Text near the edge is cut off | Creep or trimming | Add margin, or bind in smaller signatures |
| Cracked ink on the fold | Heavy ink and thick paper | Score each fold before folding |
| Staples pull through | Too many sheets | Switch to thread |
| Cover wrinkles | Glue too wet | Use a thin layer and press under weights |
Making a homemade book safe and durable for ages 3 to 8
A book for a child gets bent, dropped and dragged around, so build it to handle that.
- Choose sturdy paper. Use cardstock for the cover and consider laminating it. Round the corners with scissors.
- Press staple legs flat. If you use staples, fold the legs over fully and cover them with tape on the inside spine. Sewing avoids this concern.
- Skip loose parts. Some books with detachable pieces, such as binding rings, have been recalled for choking hazards. For young children, use stitched or taped spines instead of rings, and avoid beads, buttons or stickers that can come off.
- Know the rules if you sell. The U.S. Consumer Product Safety Commission bans children's products for kids under 3 that present a choking hazard because of small parts. Books and other articles made of paper are listed among the items outside that small parts rule. If you plan to make books for sale, check the CPSC business guidance first, because extra requirements apply to books for the youngest children and to books with play features.
For children ages 3 to 8, a stapled or stitched spine with rounded corners is a safe, simple choice. Keep the books for kids who are past the stage of putting everything in their mouths. If a younger sibling is around, supervise.
Our perspective on printable books
We build our stories, decks and activities to be handled. A printable book only works if a child wants to pick it up again, so we think about the whole object: the story, the layout and what happens on page four when a small hand turns it.
Our approach is to treat the printable as a real book. That means pages designed for booklet order, margins that allow for the fold, and art that still reads when printed on ordinary home paper. Our claim is that emotional literacy lands best when it is wrapped in a character a child loves, not delivered as a lesson. A book that a child has helped fold and staple becomes part of that story.
If you are a teacher or parent, binding gives the child a job. They fold, they crease, they choose the cover color. We design our printables and activity kits with that in mind, so the making is as much a part of the experience as the reading.
Derek Amarillas
Print, fold, bind: a Duckwave Decks option
If you want printable material that is made to be folded, cut and handled, our Duckwave Decks are a $7 one-off purchase. They are original, character-driven designs for ages 3 to 8, and they come as printables so you can make them at home or in the classroom. See the Duckwave Decks page for what is included.
For more printing help, our guide to printing and cutting cards at home covers paper weight and trimming. Once the pile of finished projects grows, organizing kids' printables, papers and art keeps it manageable.
A simple first project: an 8-page mini book
If you have never bound anything, start here. It uses two sheets of paper and ten minutes.
- Prepare an 8-page PDF, with a cover on page one and a back cover on page eight.
- In your PDF reader, print using Booklet, with two-sided printing on.
- Pick up the two sheets in the order they came out of the printer.
- Fold the stack in half and crease firmly.
- Staple twice along the fold.
- Have the child decorate the cover, then read it together.
This works well for a story the child tells, a drawing journal, or a printable story from a classroom lesson. Blank pages are useful too. Our blank comic templates for teachers fit this size well, since a child can fill in panels and then bind their own graphic story.
Tips for classrooms and homeschool groups
Binding with a group of children works best with a little structure.
- Pre-fold a few sheets. Younger children can decorate and assemble, while an adult handles the stapler or needle.
- Set up stations. One for folding, one for stapling, one for coloring. Children move through them in turns.
- Use thread only with supervision. Needles and awls are for adults or older children ages 7 and up with an adult close by.
- Print extras. Page order mistakes happen. A few spare copies save a lesson.
- Store finished books upright. Small bins or a shelf keep covers from curling.
If you want books that carry meaning once they are made, pair the activity with a story. Our guide on how books build classroom belonging shows how a shared book can anchor a classroom conversation.
FAQ
How do I bind a printable book without special tools?
Print it in booklet order, fold the stack in half, and staple along the fold. A regular stapler works if the booklet is only a few sheets thick. For more pages, use a needle and thread through holes poked with a pin.
How many pages can I staple at home?
A standard desk stapler handles only a few sheets, and a long-reach stapler handles a few more. Past that, staples tend to pull out or fail to reach the fold. One overview suggests stapling for under 25 sheets and sewing for more, but your stapler and paper weight set the real limit.
Why are my booklet pages in the wrong order?
The PDF was probably printed as a normal document. Reprint it using the Booklet option in your PDF reader, which arranges the pages so they fall in the right order after folding. Also make sure your page count is a multiple of four.
Is a homemade book safe for a young child?
It can be, with care. Avoid detachable parts like rings and beads, press staple legs flat or sew instead, and round the corners. For children under 3, check the CPSC small parts guidance if you plan to give or sell the book.
Sources
- Print booklets using Acrobat or Reader
- DIY Bookbinding Basics and Tips
- Make a Versatile No-Glue Bound Book
- Binding Methods Compared: 10 Print Binding Types
- DIY Bookbinding Techniques
- How to Print and Bind a Book at Home With Your Inkjet
- Children's Book Regulations in the United States
- Small Parts Ban and Choking Hazard Labeling, CPSC