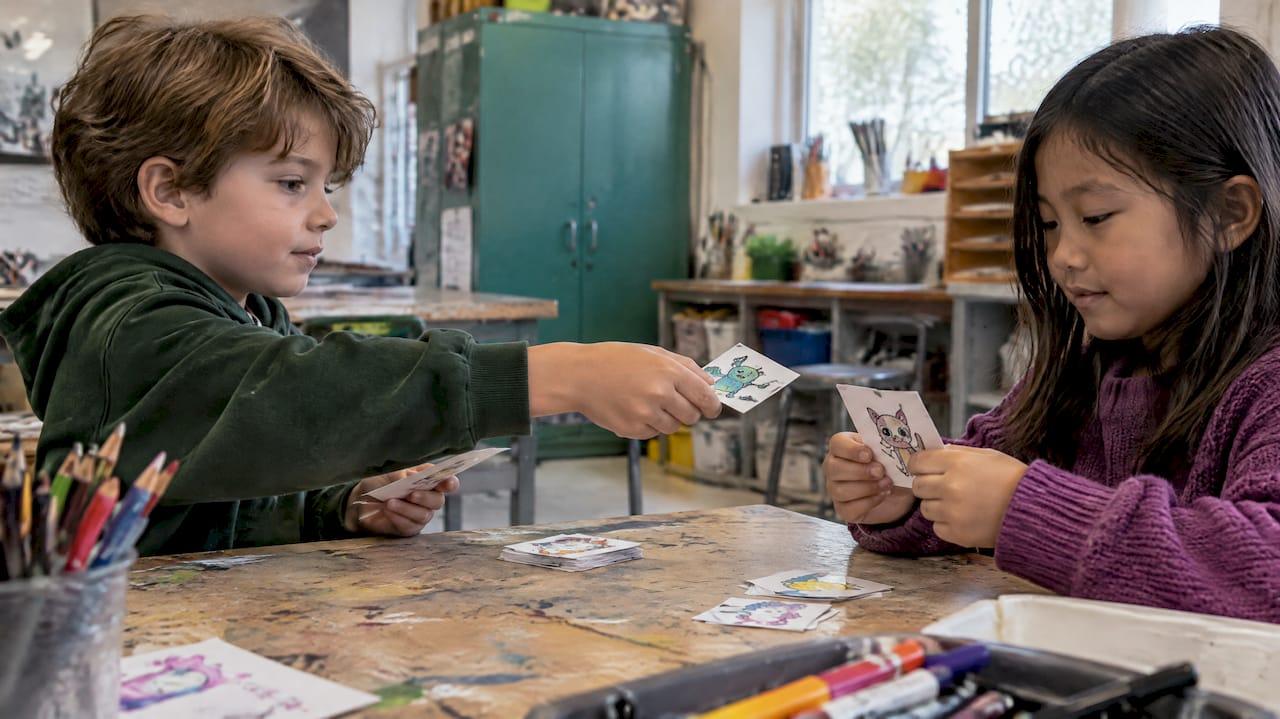
Printable kids trading cards are blank or lightly structured cards that your child prints, draws on, cuts out and collects. The standard size is 2.5 by 3.5 inches, the same as a baseball card. Print on cardstock, give your child a few markers, and they can have a small deck in one afternoon. This guide covers the size, paper, print setup, ideas for ages 3 to 8, and how to keep the cards organized once they pile up.
TL;DR
- Use the standard 2.5 x 3.5 inch card size. Nine cards fit on one US Letter page.
- Cardstock holds up best. Plain paper glued onto thin card also works.
- Ages 3 to 5 do best with big drawing spaces and an adult who cuts. Ages 6 to 8 can add names, facts and signatures.
- Pick one theme per deck: pets, feelings, favorite books, or made-up characters.
- Store and display finished cards so kids keep using them.
Table of Contents
- What printable trading cards are and why kids like them
- The right size, paper and page layout
- How to print and assemble the cards
- Card ideas for ages 3 to 8
- Materials checklist
- A simple card-making session, step by step
- Trading, playing and using the cards in the classroom
- Keeping the cards organized
- Our perspective
- Ready-made cards from Icon Literary
- FAQ
- Sources
What printable trading cards are and why kids like them
A printable trading card template is a sheet of blank cards. Each card has room for a picture and a few lines of text. Children print the sheet, fill in the cards, cut them apart, then save or swap them. Teachers and parents use the same idea for sports-style cards, vocabulary cards, book-character cards and "all about me" cards, as this free template page describes.

The format works for a simple reason. A card is small. A small space feels doable to a five-year-old who might freeze in front of a full sheet of paper. One card takes ten minutes, not an hour, and a finished card is something to hold, show and trade.
Art trading cards, often called ATCs, are the art-class version. They are tiny works of art at the same size as a baseball card, and kids can collect them and trade them with classmates, according to this kids' art project guide. The guide describes them as a low-pressure way to try drawing, painting, collage or mixed media.
The right size, paper and page layout
Card size
The standard art trading card measures 2 1/2 by 3 1/2 inches. The Frick Pittsburgh's instructions use this size and suggest making at least four cards so you have a small collection to trade. That number is a good target for a young child. Four cards is a finished project. Nine is a full sheet.
The standard size has a practical benefit. It fits standard card sleeves and most card storage boxes, so your child's cards can sit next to any other deck.
Paper
Cardstock is the first choice. If your printer does not take it, print on regular paper and glue the sheet onto thin card. Faber-Castell's art lesson says ATCs can also be made from colored or drawing paper glued to card stock, from watercolor paper, or from recycled material such as cereal-box sides. That last one is handy when you want a free supply of sturdy backing.
Match the paper to the art medium:
| Medium | Works best on | Notes |
|---|---|---|
| Crayons, colored pencils | Cardstock or printed template | Good for all ages, no mess |
| Markers | Cardstock | Test a corner first if the ink bleeds |
| Watercolor | Watercolor paper | Print the outline on thin paper and glue it down after painting |
| Collage | Cardstock | Glue stick works best for small hands |
| Stickers | Any | Good for ages 3 and 4 |
Page layout
A common layout is nine cards per page, with a second page for the nine backs. The kids' art project guide uses this format on US Letter or A4 paper. If you print front and back, run one test page on plain paper first to check that the backs line up with the fronts.
How to print and assemble the cards
- Choose a template. Pick one with nine blank cards per sheet, or draw your own on a card-sized rectangle.
- Print on cardstock. Use the standard setting. Do not scale the page to fit, because scaling shrinks the cards below 2.5 x 3.5 inches.
- Let your child decorate before cutting. Whole sheets are easier to hold and color than loose cards.
- Cut the cards apart. A paper cutter helps if you are making many. Another option from Faber-Castell is to trace around one card and cut out your own copies, which suits kids who like to design from scratch.
- Add the finishing touches. A name on the front, a number on the back, and a signature.
For a full walkthrough of home printing, trimming and corner rounding, see our guide on how to print and cut cards at home.
Help for young children
Children aged 3 to 5 usually need an adult for cutting. Do that step yourself and let your child handle the creative part. The ASU Art Museum's "Art at home!" guide also says children might need help cutting. It suggests choosing a drawing medium that won't bleed through the paper, which is a useful tip when markers are involved.
Card ideas for ages 3 to 8
A theme gives your child something to start with. The list below is sorted by age, but kids can move up or down.
Ages 3 to 4
- Color cards. One color per card, filled with scribbles, stickers or torn paper.
- Favorite animal cards. You write the animal's name, your child draws.
- Sticker cards. Each card gets a few stickers and one drawn line.
Ages 5 to 6
- Pet or toy cards. Draw the pet, then add a "power" or a favorite thing it does. This follows the pet-card idea in the ASU guide, which has children use photos as references and fill in quick facts about what makes the animal special.
- Pattern cards. Stripes, dots, zigzags.
- Family cards. One card per person at home.
Ages 7 to 8
- Book character cards. Add the title of a favorite book and a few lines about the character.
- Famous artist cards. Copy the style of an artist you looked at together.
- Invented character cards with a name, a home and a special ability.
The kids' art project guide suggests themes such as animals, patterns, emotions and famous artists to help children decide what to draw, paint or collage on a small card. The Frick instructions add a nice touch: sign each card, and hide the signature somewhere so friends look closely.
Feelings cards
Emotions are one of the best themes for this format. Ask your child to draw what "nervous" looks like, or what a calm day feels like. One face per card, one feeling per card. Over a week you build a deck of feelings that the child made and can name. Our feelings collage activity works well as a warm-up, and it takes 20 to 40 minutes.

If your child likes to invent characters, our guide to co-creating characters in 10 to 20 minutes gives a simple way to start.
Materials checklist
You do not need much. The Frick's list includes a pencil, paper (card stock if you can), a ruler and scissors. Optional extras include colored paper, glue stick, paints, markers, crayons and aluminum foil.
- Printed template sheets on cardstock
- Pencils and an eraser
- Crayons, colored pencils or washable markers
- Glue stick and scrap paper for collage
- Child-safe scissors, or a paper cutter for the adult
- Stickers
- A small box or envelope for the finished cards
If you want a break from drawing after the card-making is done, these digital math games for kids are a good way to keep the learning going on screen.
A simple card-making session, step by step
Here is a plan that fits in 45 minutes.
- Set up (5 minutes). Put out the printed sheets, the pens and the glue. Cover the table.
- Pick a theme (5 minutes). Let your child choose from two options, not ten. Too many choices slow young children down.
- Draw (20 minutes). Work on the whole sheet. If your child finishes one card, suggest a second with a different color.
- Cut (10 minutes). An adult cuts. Older kids can cut straight lines with supervision.
- Sign and number (5 minutes). Each card gets a name. Older children can number the backs, like a real set.
Stop when your child is done, even if only three cards are finished. Three is a deck.
Trading, playing and using the cards in the classroom
The "trading" part is the fun part. A few ways to use finished cards:
- Swap day. Each child trades one card with a friend or sibling. Everyone leaves with something new.
- Show and tell. A child picks a card and says why they made it.
- Memory match. Make two cards of each design and play pairs.
- Story starter. Pull two cards from a bag and make up a story using both characters.
- Class set. Each student makes one card, and the class collects them into a shared deck.
For teachers, the same cards work for vocabulary, book characters and "all about me" introductions. A printable template saves prep time, and the finished cards become a display. For role-play practice with the same deck, try our 5-minute role play routines.
Keeping the cards organized
Once your child makes a few decks, the cards start to spread across the house. A few ideas:
- Keep each deck in its own envelope or small box, labeled by theme.
- Use sleeves for the favorites.
- Display a few cards at a time on a shelf or board.
We cover this in more detail in our posts on card deck display ideas, card deck storage and how to organize kids' printables, papers and art.
Our perspective
We make stories, card decks and activities for children ages 3 to 8, and we think cards are one of the best formats for this age group. They are small, they are collectible, and a child can finish one in a sitting.
Our approach is to support emotional literacy without lecturing. A card with a character on it can open a conversation about a feeling, and the child leads the conversation. That is why we design our decks around original characters and a playful, art-forward look, and why we like activities where children make their own cards after they have seen ours.
Our advice for parents and educators: let the child decide what goes on the card. A purple duck with a worried face is a good card. The point is that your child made something, named it and has it in their hands.
Derek Amarillas
Ready-made cards from Icon Literary
Some days you want a blank template. Other days you want a finished deck to start from. Our Duckwave Decks are themed card decks from our Duckwave Universe, priced at $7 one-off, and they work as a model for the cards your child makes next.
Browse the Duckwave Decks and see what the characters look like, then ask your child to invent their own to go in the same box.
FAQ
What size are printable kids trading cards?
The standard size is 2.5 by 3.5 inches, the same as a baseball card or most collectible game cards. The Frick's instructions use this size for artist trading cards. Nine fit on one US Letter page.
What paper should I print them on?
Cardstock is best because it is stiff enough to handle and trade. If your printer cannot take it, print on regular paper and glue it onto thin card. Cereal-box cardboard also works as a backing, as Faber-Castell notes.
Can a 3-year-old make trading cards?
Yes, with help. Let your child scribble, sticker or color, and you do the cutting. Keep the theme simple, such as one color or one animal per card, and stop after a few cards.
What is the difference between art trading cards and regular trading cards?
Art trading cards are handmade, so every card is one of a kind, and kids usually trade or swap them instead of buying them. Regular trading cards are printed in sets. Both use the same card size, which is why they fit the same sleeves and boxes.
How many cards should we make?
Aim for four or more so there is something to trade. That is the minimum the Frick instructions suggest for a small collection. A full template sheet of nine makes a complete mini deck.
Sources
- Free Trading Card Template, Buggy and Buddy
- Artist Trading Cards, The Frick Pittsburgh
- Artist Trading Cards Art Lesson for Kids, Faber-Castell USA
- 30 Easy Artist Trading Cards Ideas for Kids
- Art at home!, ASU Art Museum
- 5 Digital Maths Games You Can Play with Your Child